Sunday 11 November 2012

Milky Way

Here's another quilt for another aunt, quilted sometime ago but the documenting left for another day. Today. Calling it 'Milky Way'. Looks apt, no?


'twas my first try with curved seams.


For those of you who asked for a tute, see if this helps:

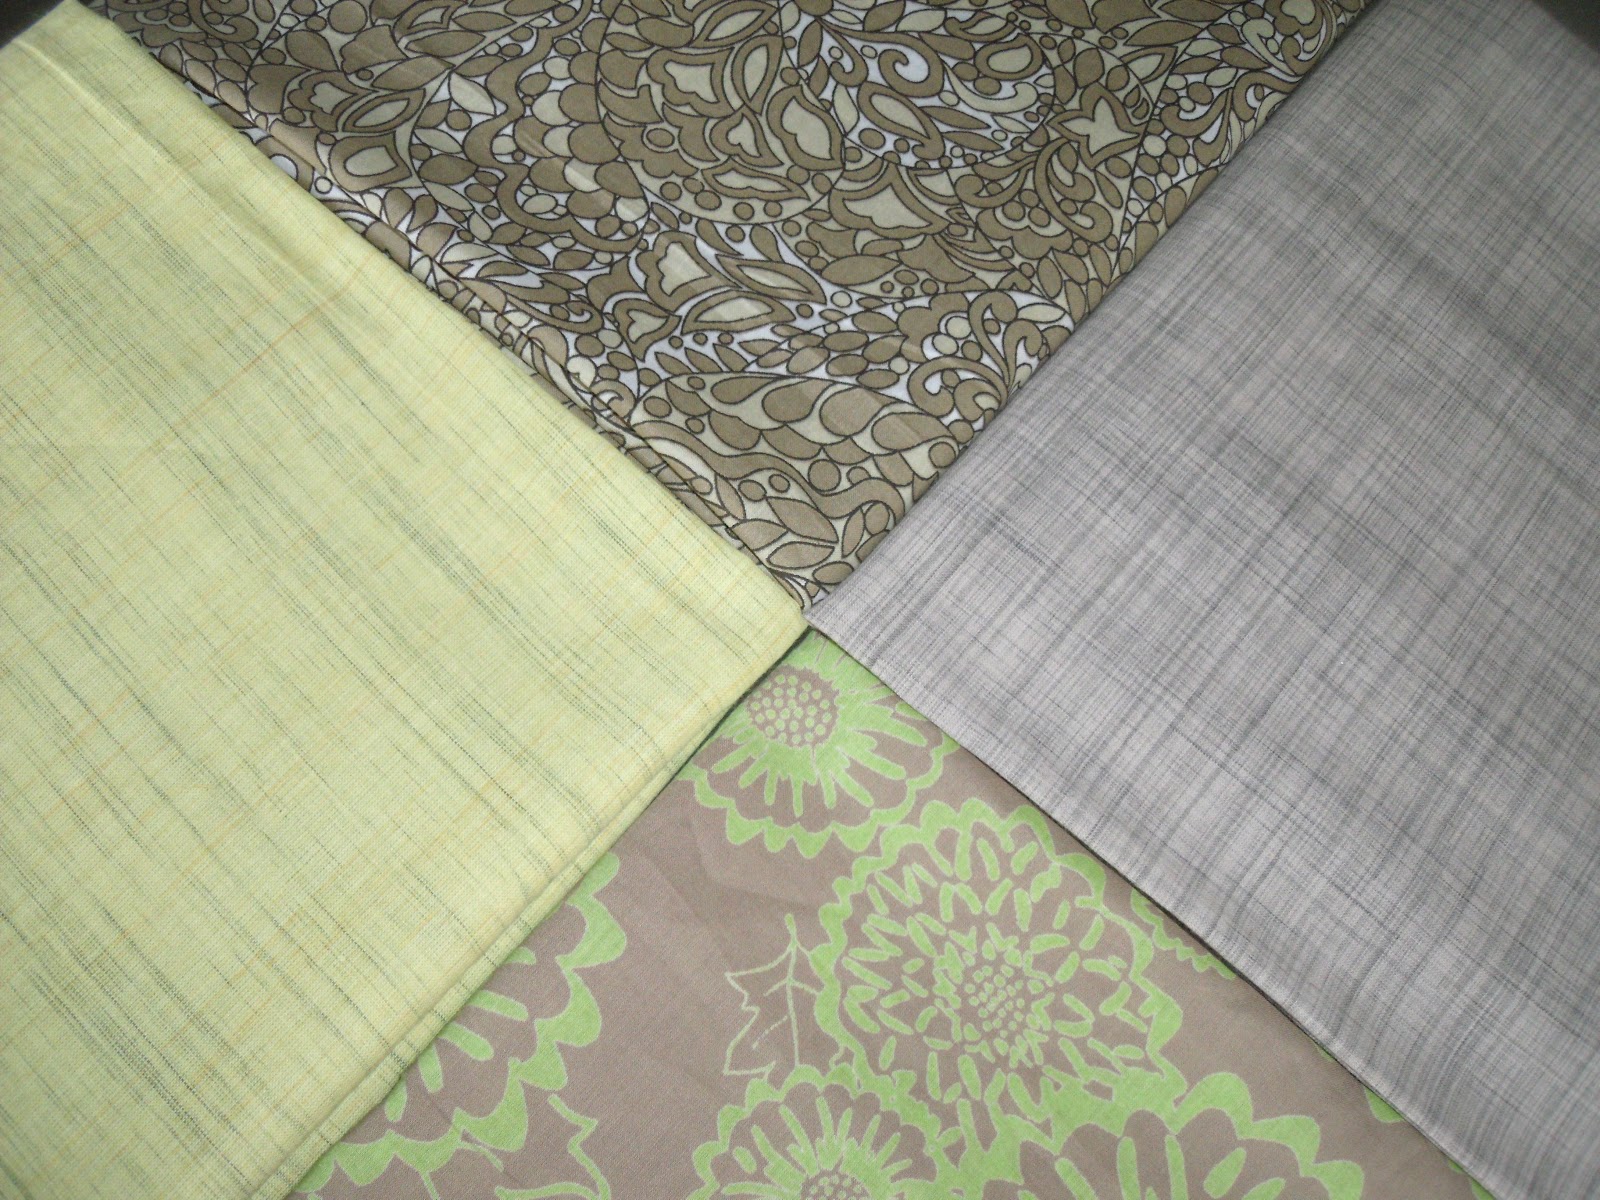
Step1 - Choose 2 coordinating/contrasting/absurd main fabrics. Prints/solids/whatevers. Add a couple more for borders if you like.


Step 2 - Lay the main fabrics (A & B) right side together and pin baste to avoid shifting. 

Step 3 - Mark 4 dots at irregular distances on the top edge and identical ones on the bottom edge. Draw smooth waves connecting the corresponding dots the across the length of the paired fabrics and gently cut along the lines. (I did 4 such cuts, giving me 5 sections of wavy strips. But you can do more if you want a smaller grid) Be careful to not disturb the placement of the strips. You can number the strips on both fabrics if it makes your life easier.

Step 4 - Remove the pins and gently separate out the 2 fabrics. Now replace every alternate strip of fabric A with its sister strip of fabric B. This will give you two similar but not identical Sets 1 & 2.


Step 5 - Now gently sew the strips to make 2 separate sets. No tugging, no pulling. Its easier to sew accurately if there are points to match at short intervals. I just drew 1" cross lines with tailors chalk. You can see them if you look closely inside the 'O's.

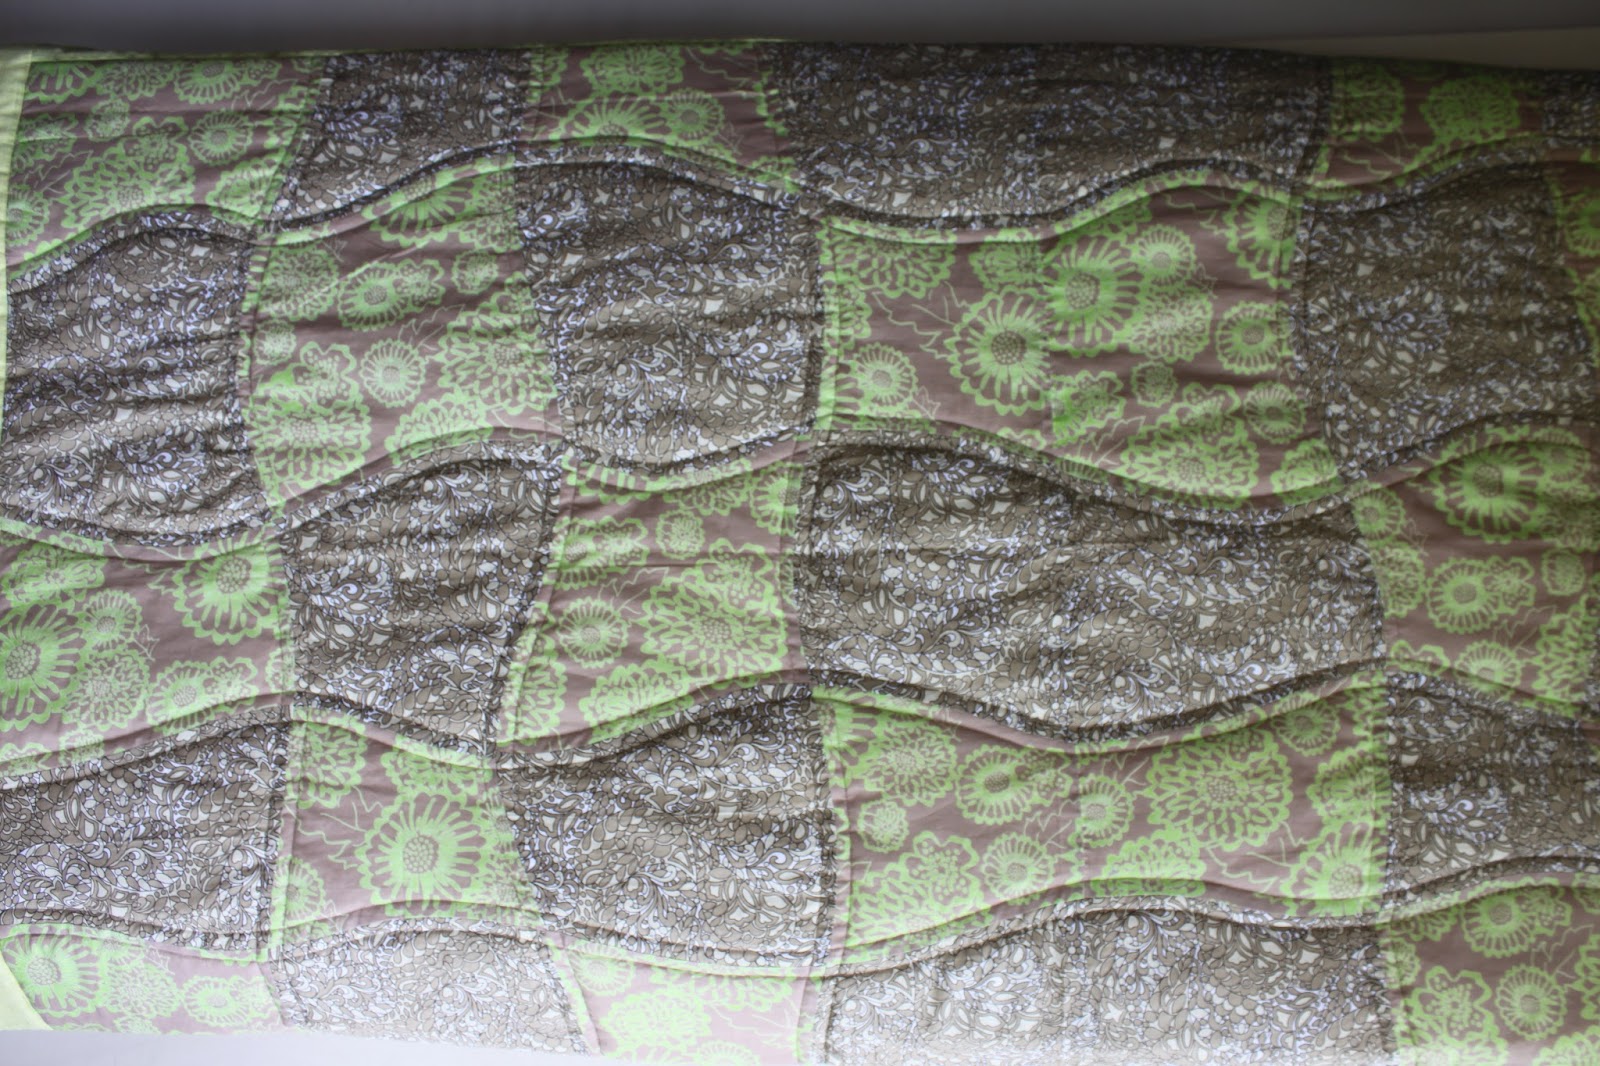
Step 6 - Now again draw gentle waves, this time across the width of fabric. On both Sets 1 and 2. Now this is where I got lazy and did a stupid thing. I cut it into 4 cross sections instead of 5. Remember you need an odd number of cross sections for this to work. 


Step 7 - Again, number strips, replace alternate strips on Set 1 from Set 2, sew. You dont need to mark points to match this time coz you have the previous seams doing the job. On sewing, you will end up with finished panels 1 & 2. Now all you gotta do is sew the two panels together and voila !

You see the part in the middle where the grid is kinda elongated? Thats coz of my blooper with cutting an even no. of cross sections instead of odd. Oh well, one lives and learns. Or is it learns and lives??

Step 8 - Well, the tute part is over. The rest is just to accommodate all the excessive photography that I seem to have done. Anyways, step 8, add borders as per your fancy, prepare sandwich and quilt. I quilted 1/4" along either side of every seam.


Step 9 - Attach binding. Or just roll over the backing to the front and top stitch it in place.

Step 10 - Photograph quilt. More than necessary. Most important part of the entire quilting thingamajiggy :-).

Step 11 -Bundle it with much love and send it off to whoever you made it for. Coz thats what quilts do. They take our love and all that is good with this world to their new owners.

Step12- Blog about it ! Be sure to include all cute puppy/kitty/budgie pics.


Happy quilting ! And all the associated joys.


Saturday 10 November 2012

Lanterns

Oi, here's a quilt that I made about 9 months back but forgot (?) to document and blabber blog about (!!).Its called 'Lanterns' and was made for my 15 year old daughter's friend, also 15. Its a simple quilt, with very simple snowball blocks and came together very quickly. 


The backing is pieced with leftovers of the lantern fabrics.


And since I am forbidden from sharing the story behind the quilt by my daughter, I shall share some 'before' and 'after' moments instead..:-)..

Before:

This is the beautiful kitchen of my lovely friend Sabine. Its where I go when I need a good shoulder over tea, a good laugh over wine, a good machine when mine betrays me. Over tea OR wine. I'm not picky.

During :

Yep, thats the lovely lady on the left and me on the right slapping on some binding. 

After:
We lit a bonfire in a broken recycled flowerpot on the terrace (Sabine, don't kill me!) and had some tea by the makeshift fireplace. Or was it wine? The tea makes it hard to remember. 

After after:

Ah ok, it WAS wine. See, thats why we need to document stuff.

Cheers !!

Friday 9 November 2012

Rainy Day Quilt

I've been a bad girl. And I haven't updated my blog in a while. Like someone recently remarked, "I love chaos. Till it tires me and then I love routine. Till it bores me and then I love chaos" ! Story of my life.

Well, here's my latest finish, The Rainy Day Quilt, which quite obviously had its beginnings on a lovely rainy day a year back. (Yes, a year back!) After some starts and stops over the past year (mostly stops), it finally made its journey from the UFO to FINISHED pile. Am happy to report that even as I type, its on its way to the recipient, a dear friend's mom whom I call Aunty.


Too bright you say? Well, I did call and ask my friend what colours her mom would like only to be told that Aunty wears only very muted and soft colours. So I tried putting together a very low volume palette for her. But something inside screamed, 'wrong, wrong, wrong'. I should tell you a bit about this lady in question. She is an amazing woman in whos path Life has tried to throw every kind of googly. She has dealt with each blow with quiet strength and amazing grace, qualities I admire HUGELY. But I think that the sadness that such tragedies bring to our lives, somehow seeps into our daily colours and I wanted something bright and absurdly happy for her. So.

What, not bright enough you say? Well, I did try to mute it a bit by adding a border of tiny pastel roses and a not overly bright backing. Just in case, you know :-).


Did some FMQ, outlining the fussy cut roses and doing some leaves and tendrils on the chequerboards.


Ok, ok, I TRIED some fmq. The odd shapes make me smile :-).


Did some waves on the border..some hot pink binding..


..and bundled it off with lots of love to dear frail-looking-but-super-strong Aunty to be used as a pick-me-up in hard times and a superwoman cape in others.


Spread the love people ! Hot pink rules !!

Btw, did you know good girls go to heaven? Bad girls go everywhere.