Showing posts with label Applique. Show all posts

Monday, 22 September 2014

Sun Bonnet Sew

Sun Bonnet Sew, in my studio 'The Square Inch :-)


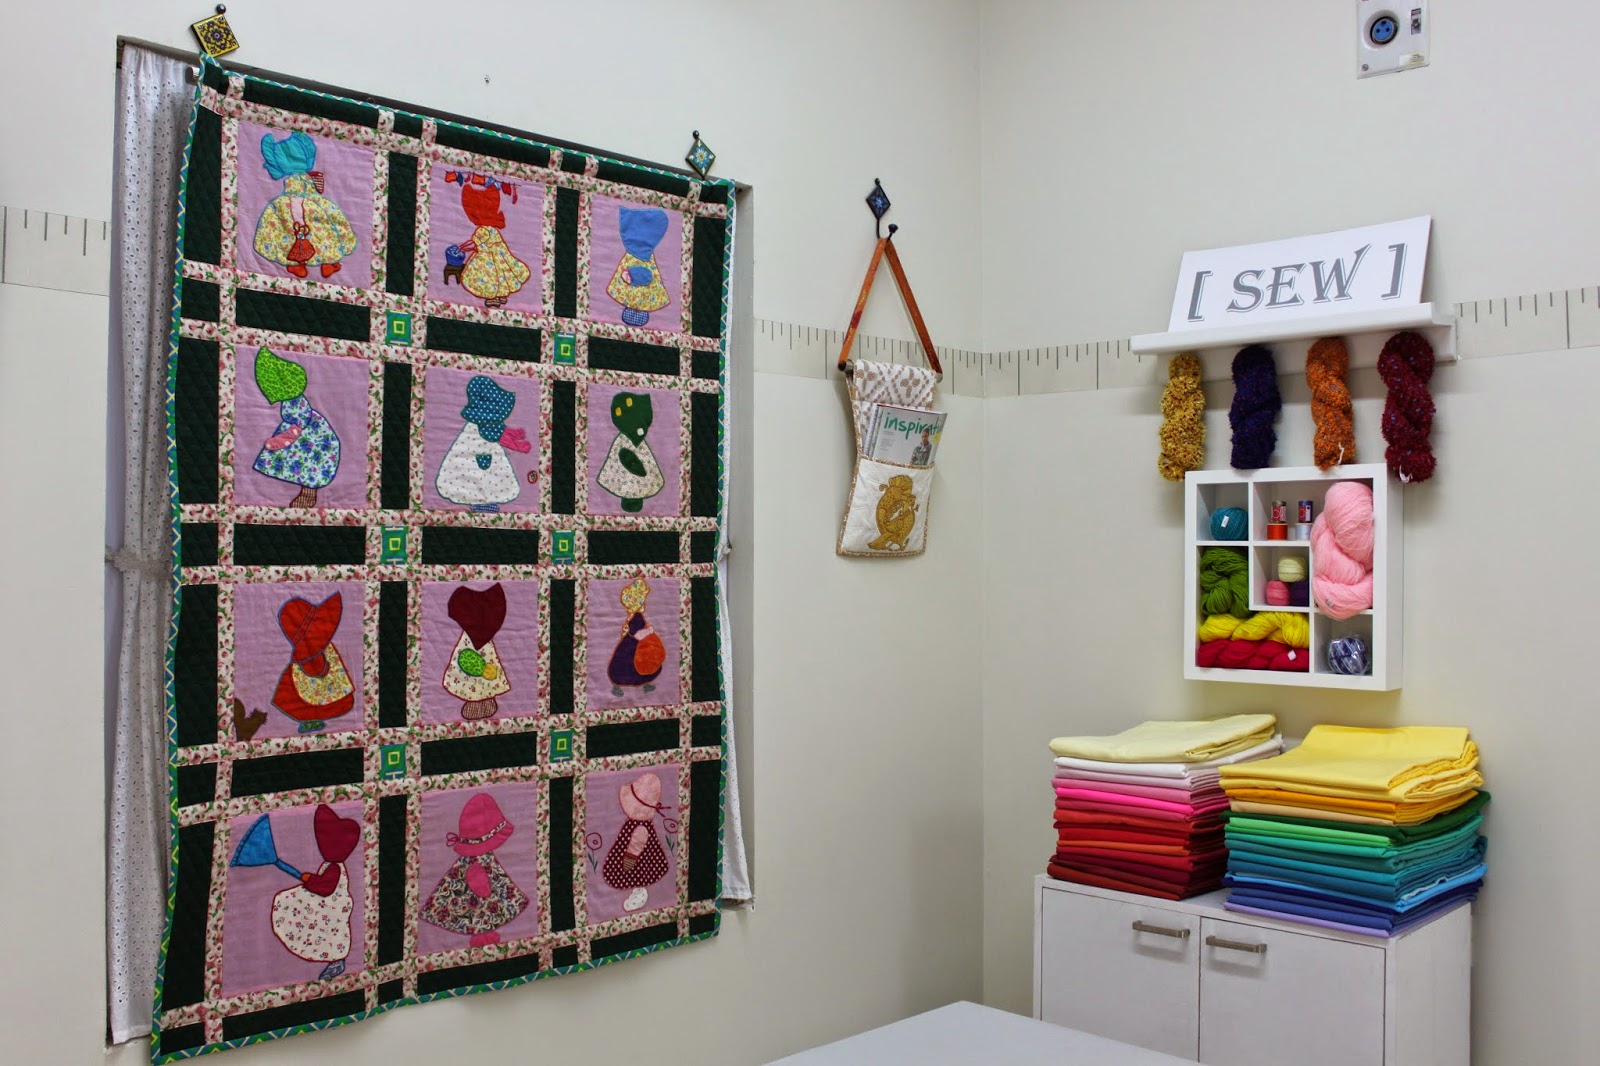
Well, personally I've never had a thing for Sun Bonnet Sue and was pretty sure I'd never ever make one. But then the Universe has a way of teaching you lessons you don't wanna learn ! So, in walks a client with a half finished hand-appliqued Sun Bonnet Sue Quilt, passed on to her by her mother.


The appliques were all done individually and then the blocks hand sewn on to commercial quilted fabric. She asked if I could finish it as a wall hanging and with the Navrathris almost here, she wanted to use it as a back drop to her Puja Golu.


We didn't have much time to give it some pizzazz, so just sashed it with some printed fabric, added some cornerstones, bound it and attached a hanging sleeve.


Hope I have just justice to the beautiful hand applique and turned a mom's UFO into a treasured heirloom for the daughter.

This one is my favourite. Oh wait, I thought I didn't have a thing for them ! Oh well, who can resist them, I guess. Lesson learnt ! :-).


Am guessing the li'l dollies will complement the Golu Dolls quite nicely. Hoping.

Thursday, 8 May 2014

Pink Posies 1

As promised in my previous post, here's a look at 'Pink Posies 1'. Of course it didn't have a numeral at the end of its name then !

Size 48"x60"


Nice? Glad those orphan pinwheels found a place :-).

Tuesday, 6 May 2014

Pink Posies - 2

This is totally dumb. I just named my latest quilt Pink Posies 2. Yes, there was a Pink Posies 1 and I am JUST realizing that I never got around to posting the pics on the blog ! Shame on me ! Will do it tomorrow.

Anyway, a dear friend of mine was going though my quilt pics on Facebook and decided she wanted something like Pink Posies 1 for her daughter and asked me if I could make her one. Well, yes and no. I like trying out different techniques and styles and try to make no two quilts alike. So using that one (pic tomorrow, promise) as an inspiration, I made this one as I wanted to try out my brand new Dresden Ruler.


Four flowers, a couple of buds, a couple of pretty butterflies, some swaying blades of grass and its a perfect quilt for a li'l girl.


Love the texture created by the FMQed grass..


Diagonally pieced back to incorporate the princess fabric that my friend loved. A word of advice for those wanting to attempt a diagonal pieced back - DON'T. It gave me such a hard time !

Appliqued the li'l darling's name on the back.


Even put my label there! First time :-)


Here it is in all its glory in my studio. Love love love !

Monday, 23 September 2013

Ovie's Window

There are still a few quilts that I haven't documented and this is was one of them. Made wayyyy back in Jan 2011. Okay its not all that long back but it was right in the beginning of my quilting journey.

Knowing of my obsession with fabric and my new found love for quilting, a dear friend gifted me this awesome book called 'Material Obsession' by Kathy Doughty and Sarah Fielke. Inscribed inside was, " Dear Tina, Just a bribe for my first personalized designer quilt :-)", signed by Ovie, the adorable (then) 2 year old daughter of said friend. Well, of course I had to make one rightaway. From. the. book.

In the book was this cute pattern called 'Holiday Morning'.


 I added to the design idea and came up with this quilt for li'l Ovie.


The tree branches are pieced; the leaves, flowers and birdies are appliqued and the words embroidered.


 It was fun playing around with the leaves and birdies, trying to give each block a different look.


The sashing was a disaster tho. I wanted it to look like wooden window frames and instead, it ended up looking like a lepeord had swallowed the poor birdies ! Didn't stop me from naming the quilt 'Ovie's window'  :-).


I hand quilted around the appliques and the rest I stitched in the ditch by machine.


And so it was sent off to Ovie, all bundled with love, eagerly awaiting her verdict. She loved it. Phew.


Just spoke with her daddy today and I think it's time Ovie, who is not so little anymore, got another personalized designer quilt. :-)


Love you, Ovie. God bless !


Monday, 15 July 2013

The webs we weave

Or quilt.

Ever notice how when you are totally swamped with work, most of it absolutely urgent/important, you get this pressing need to experiment with something totally not? And well, when that happens to be a quilting brainwave, a quilters gotta do what a quilters gotta do, right? Weave webs. So the experiment miraculously comes to the front of the long line of jobs that are clamouring for your attention and you set to work(?) ignoring all else.

My spiderweb experiment was one such.


 Wanted to do a comparative study of the behaviour of lines and the visual effect thereof. Now if I have managed to catch your attention (or lose it), may I cut through the BS and just show you what I did?

Step 1. Drew (almost) identical patterns on two sheets of paper (8.5" square) using intersecting lines and concentric squares. Do make sure that the intersecting lines are of an even number. On one sheet, maintaining the points of intersection, I made the lines wavy instead of straight. (Told ya it was an experiment.)


Step 2.I already knew I wanted this to be a play in Black and White, but one could use any two colours or prints. I placed a 10" square of black fabric on a 10" square of  white fabric and pin basted ALONG with the paper pattern on top. You will want to keep the darker fabric on top. You'll soon see why.


Step 3.Take it to your sewing machine and, with a reduced stitch length, sew on all the lines on the paper. Here's a learning - use the same colour thread as your top fabric unlike the boo boo I made.


Step 4.Make sure you haven't missed sewing on any section of the pattern and THEN gently rip the paper out. Here's where your reduced stitch length helps by making it a lot easier to rip.


Step 5.Now comes the magic. Taking a small but sharp pair of scissors, carefully snip out the black fabric from alternate sections. And voila, this is what you have ! (Note - had the lighter fabric been on top, the darker fabric would've shown through the uncut sections)


Step 6. Now make a sandwich adding batting and backing, pin baste and take it to the machine again. I used a close zig-zag/satin on the machine over all the lines in fuschia and neon green to effectively quilt, cover up all raw edges, AND make a bold style statement :-).


Step 7. Square up, add binding and put in a loop in one corner if you like.


Step 8. Stand back and admire your handiwork.


Step 9.Think up valid/wild excuses as to why the rest of your work didn't get done.
 
Ah, the webs we weave.


Saturday, 12 January 2013

Flower Power

Sometimes things just fall in place. When the time's right, everything just sorta comes together by itself. I've been wanting to document my pre-blog quilts for a really long time but havent done so coz..well, I really have no good reason, actually. Does 'laziness' qualify? :-)

So my good friend Chumkie is holding a linky party over at her blog, My favourite things and this week's theme is 'Appliqued quilts' and I think, hey, finally the time's right to document this piece I made (in October 2011)  for a friend's fiesty 9 year old daughter...a quilt with flower power..


The 12 freehand flower motifs were first appliqued onto these huge circles (dunno what I was thinking!) which were then appliqued on to the pieced maroon background (again, dunno what I was thinking !!). To reduce bulk, the circle backs were cut out. Turns out I wasn't thinking very much as I decided to hand quilt the thing !!


Some laborious hand quilting along the stripes in the background fabric, some embellishment with two-tone ric-rac lace..


..and all bundled with love and sent off to princess Anaga.


Linking this up Chumkie. Thanks for helping things fall in place :-)